- Check the handle smart lock accessory package required for installation.
Usually contains varying numbers of square bars, solenoids, screws, screws, square bar springs, etc. Other non-installation accessories such as IC cards, batteries, mechanical keys, certificates, hole templates, etc., you can also pay attention to confirm these.
- Confirm the door opening method.
There are four ways to open the door: left inner opening, left outer opening, right inner opening, and right outer opening. Taking the person standing outside the door facing the door as the standard, the door’s rotation axis is on the left side of the door, which is left opening, usually using the left hand to turn the door handle to open the door; the door’s rotation axis is on the right side, which is right opening, usually using the right hand to turn the door handle to open the door; the door is pushed inward for inner opening, and the door is pulled outward for outer opening.
- Confirm the door requirements.
The door requirements directly affect whether the corresponding smart lock can be installed. Here, the installation methods and requirements of smart locks of different brands and series may be different. Before choosing a smart lock, you need to clarify the type of door and related data and give it to the smart lock sales or customer service staff.
If you install SAVLM Smart Lock, the thickness of the door should be between 40mm and 110mm.
- Adjust the direction of the door handle on the front panel.
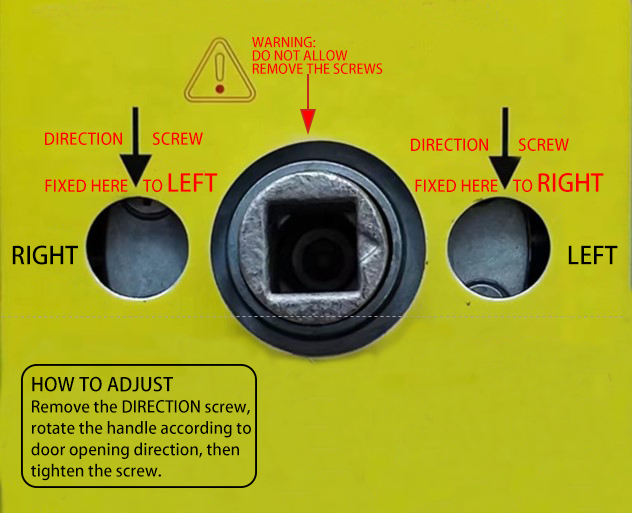
Remove the reversing screw, rotate the door handle according to the direction of the door opening, and then fix the reversing screw.
Then rotate the square shaft fixing wheel on the front panel, and align the arrow to “left” or “right” according to the left/right opening.

- Adjust the direction of the door handle on the rear panel.
Loosen the reversing screw and rotate the handle to the appropriate direction, and tighten the screw in the threaded hole.
- Adjust the direction of the lock body oblique tongue and cut the top and bottom hooks.
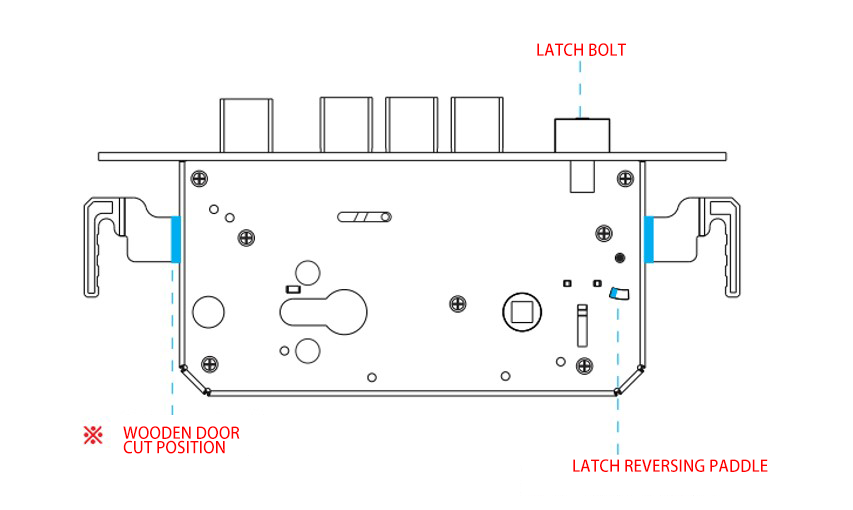
Punch out the main lock tongue, turn the “oblique tongue adjustment paddle” to the far right, and the oblique tongue will pop out. Rotate the oblique tongue 180° and press it into the original position of the lock body.
For wooden doors, use a square stick to punch out the main lock tongue and the top and bottom hooks, and use a hacksaw to cut off the top and bottom hooks along the root as shown in the figure, and then use the square stick to punch out or retract the main lock tongue smoothly.

- Install the lock body. Fix the lock body to the corresponding position.
Anti-theft doors use M5×10 screws, and wooden doors use M4×20 self-tapping screws.
- Install the front panel.
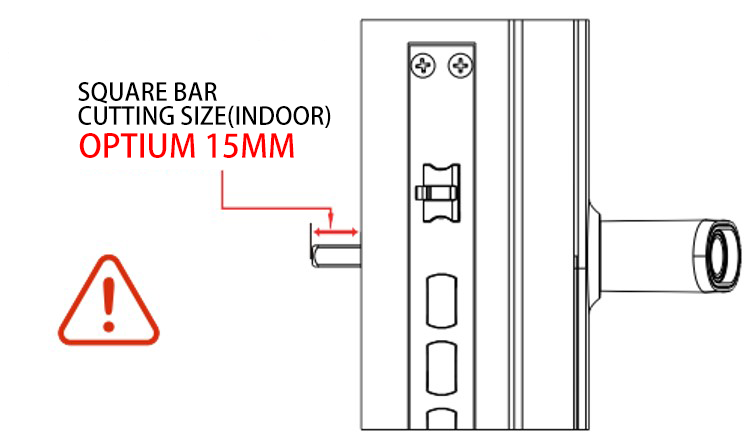
Insert the square shaft and buckle the front panel into the door panel and lock body.
Here you need to be careful to prevent the wire from being scratched by the top and bottom hooks.

- Install the rear panel.
Install the paddle and fix it on the safety knob with a split pin; install the plug wire; install the battery; buckle the front and rear panels.
Note that the spring in the figure must be placed to support the square rod.
- Installation, debugging and testing.
Check whether the installation is successful and whether the function is normal.


